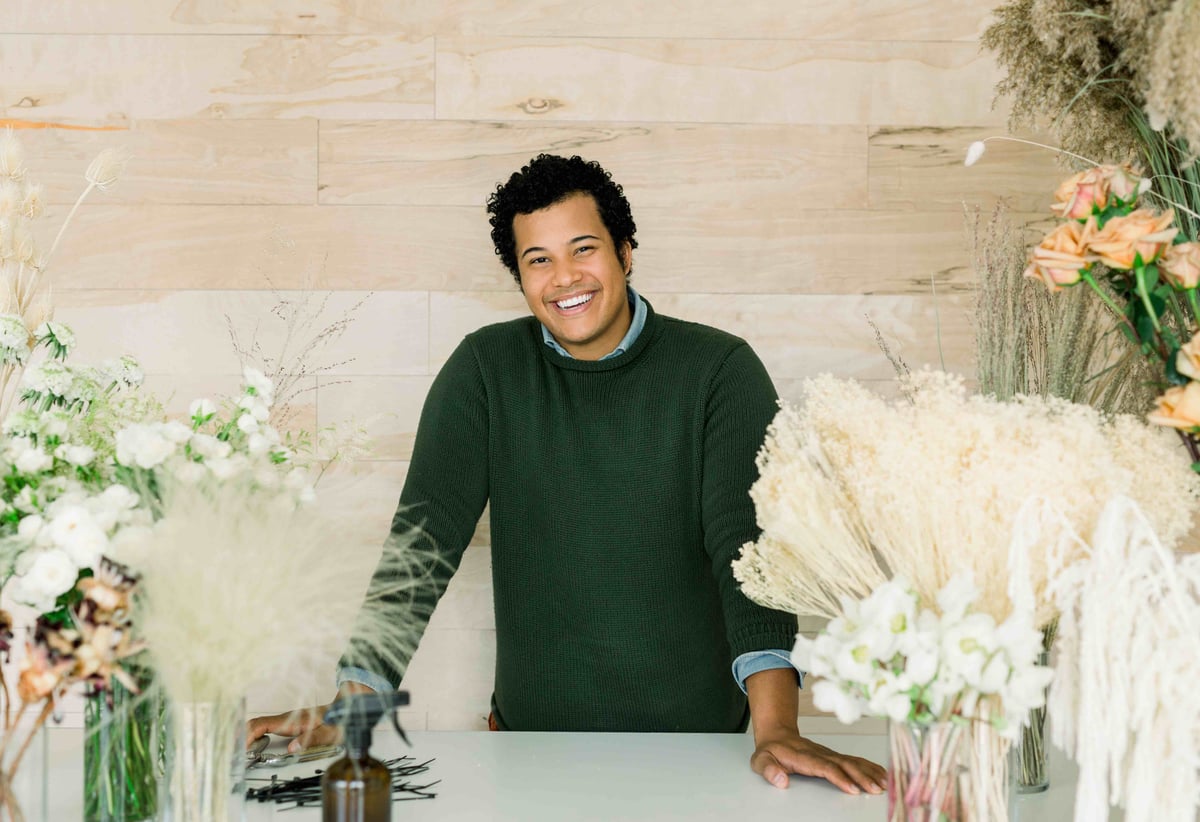
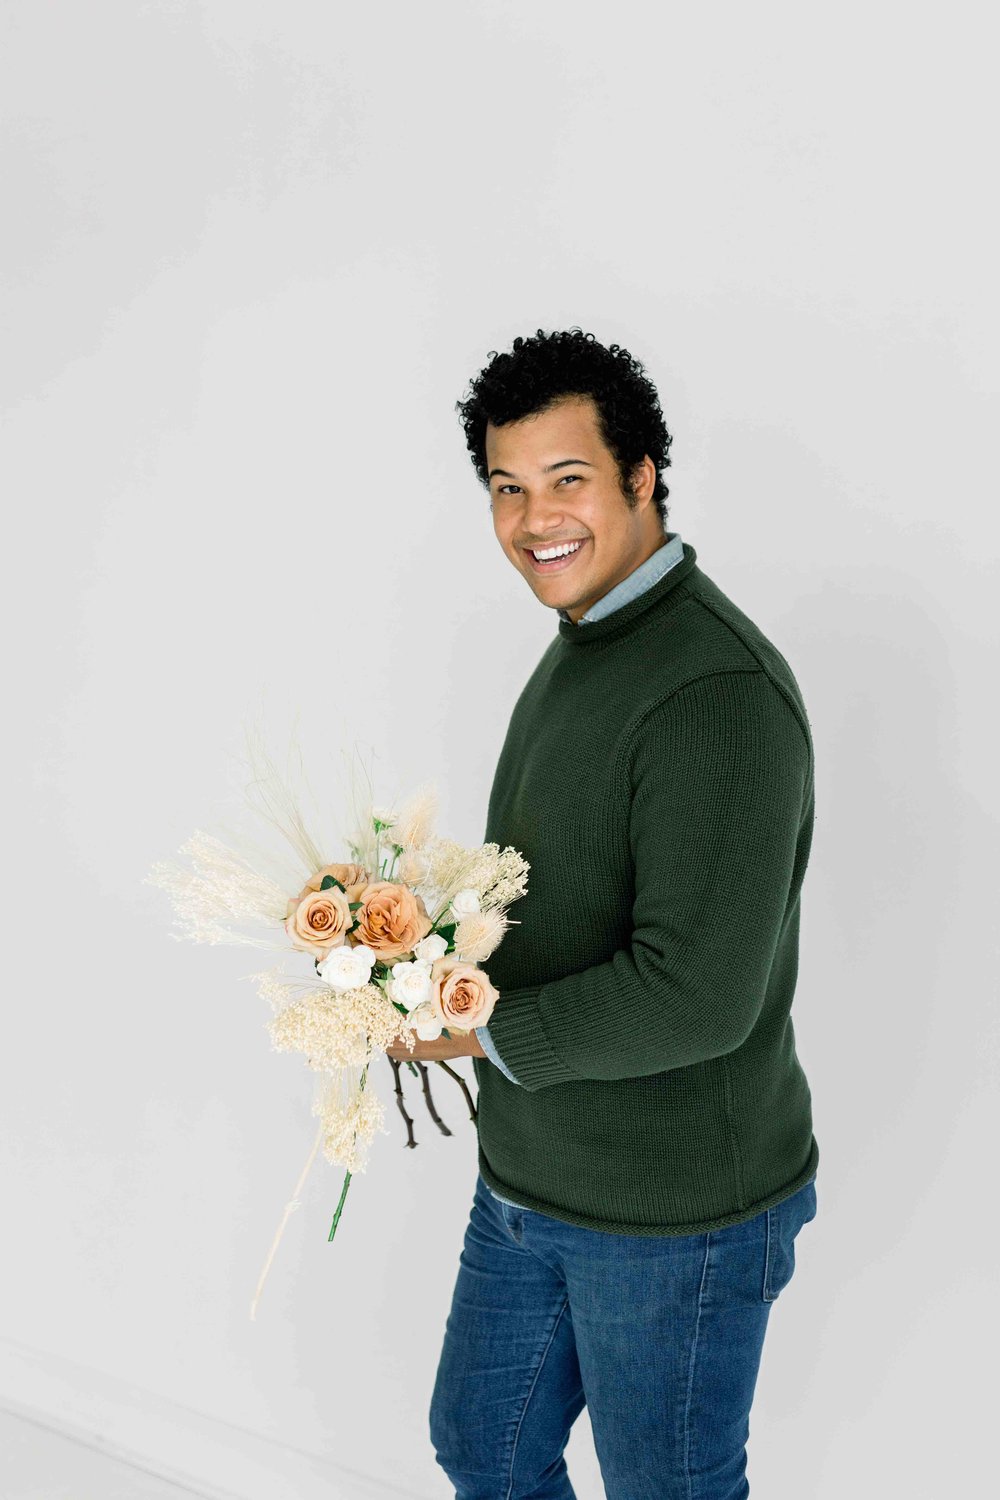
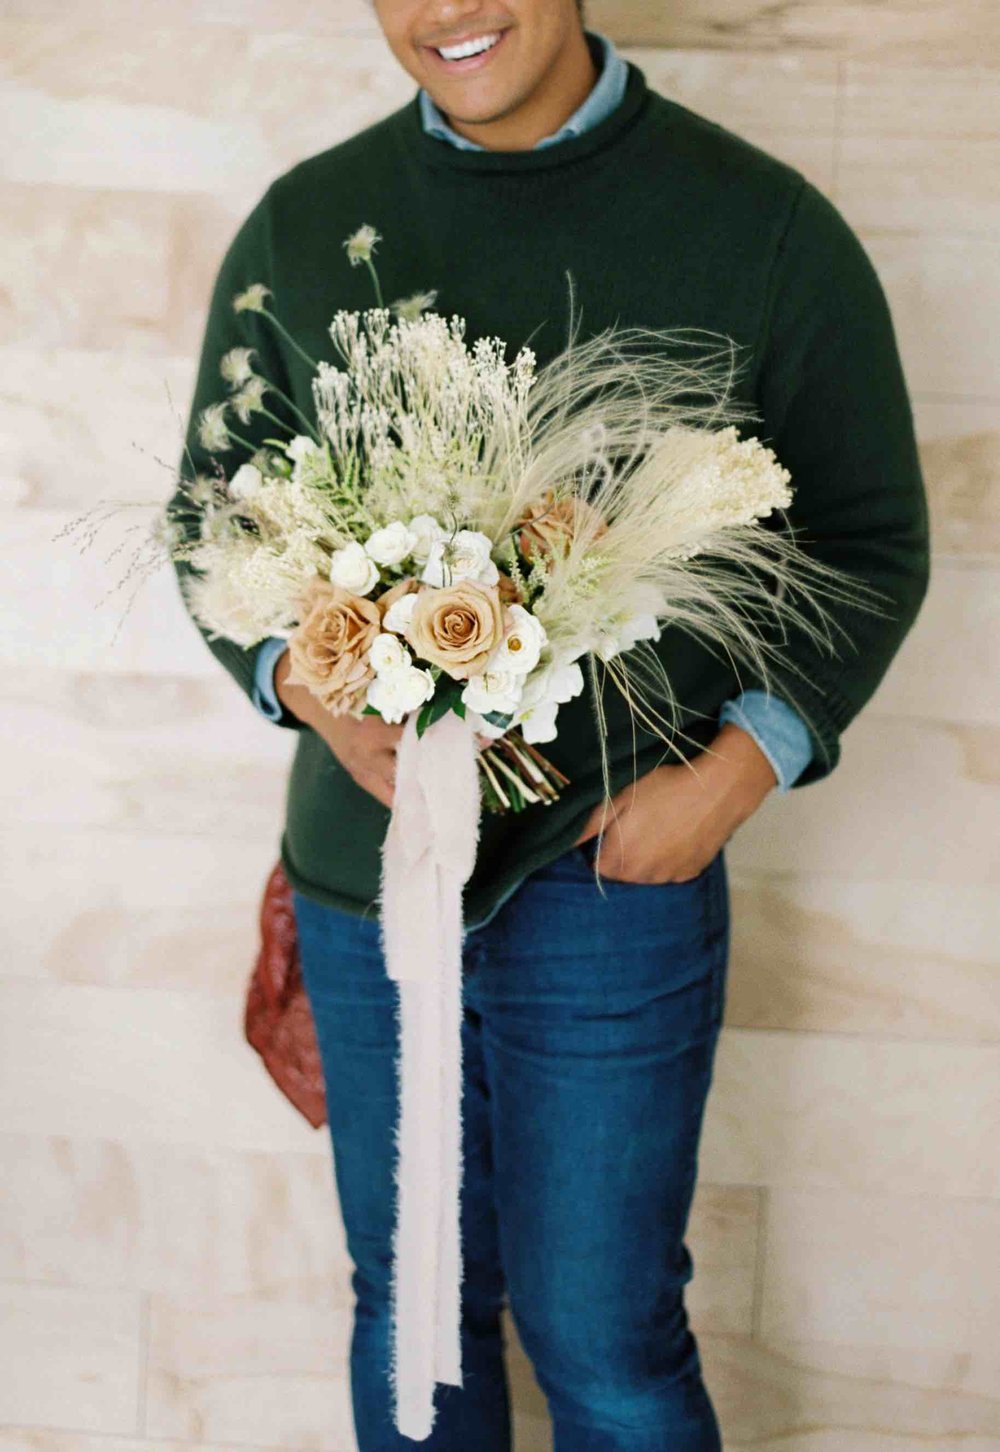
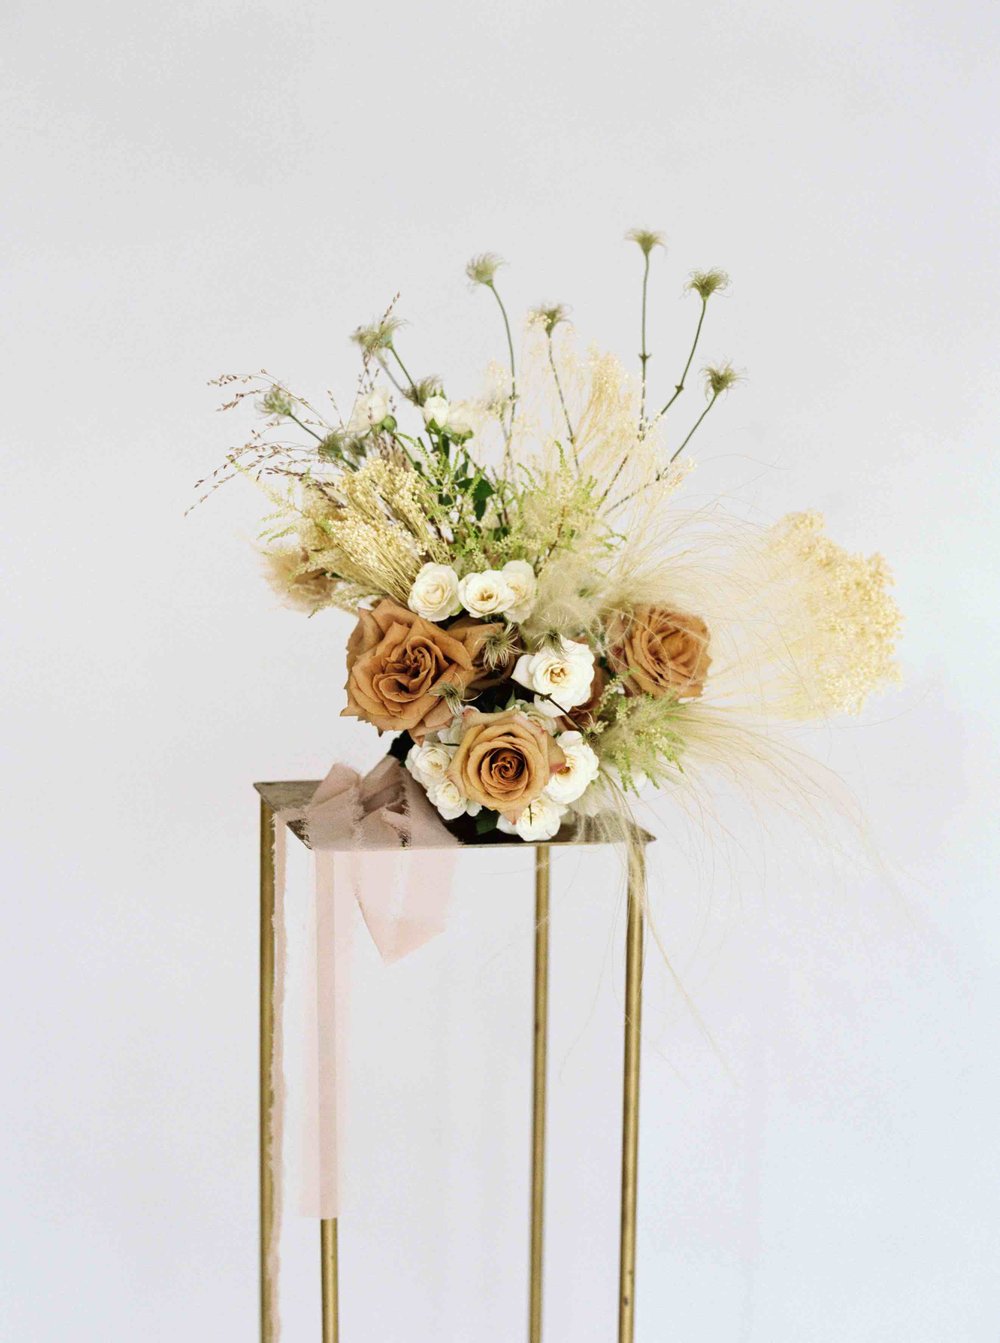
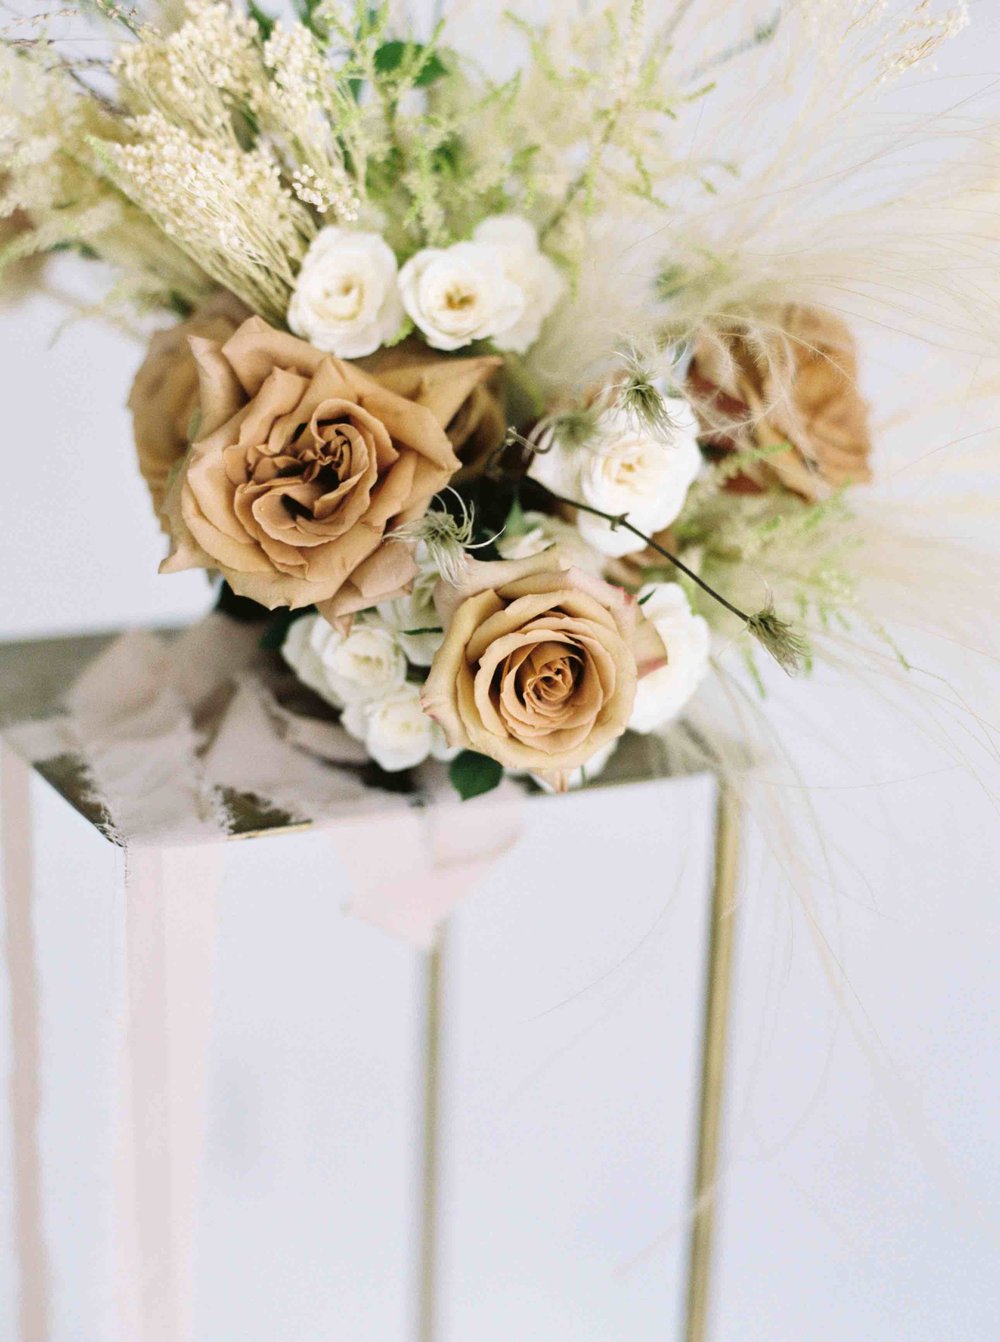
We are so excited to present Shean Strong’s first episode of our 2019 Design Star video series! In this episode, Shean demonstrates how he creates a unique wedding bouquet, incorporating different textures with both fresh florals and dried products.
FEATURED PRODUCTS:
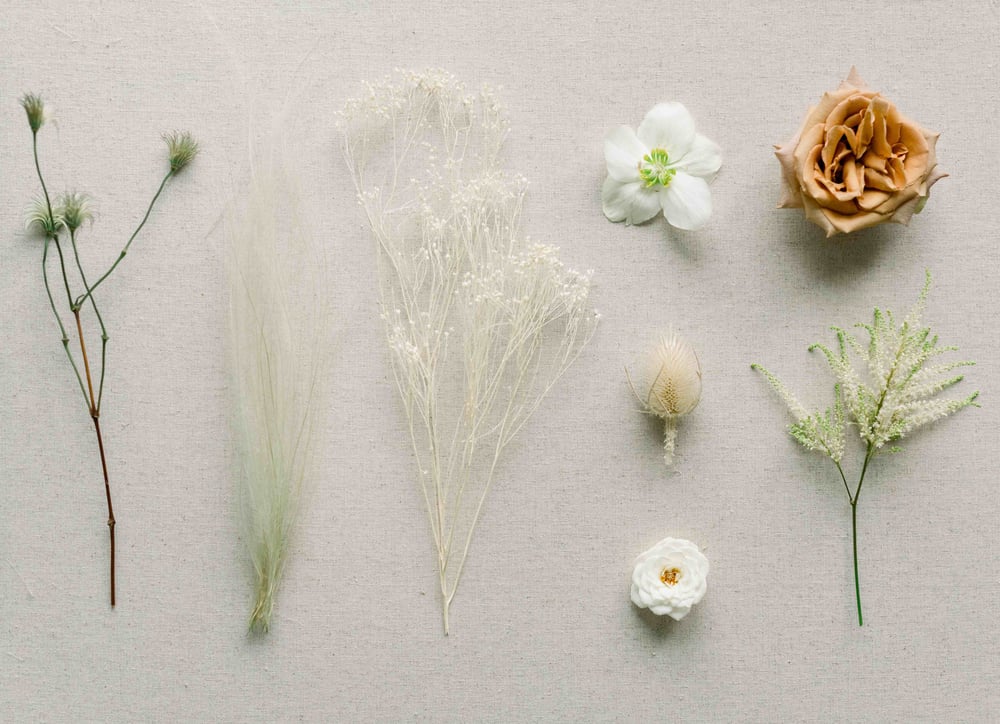
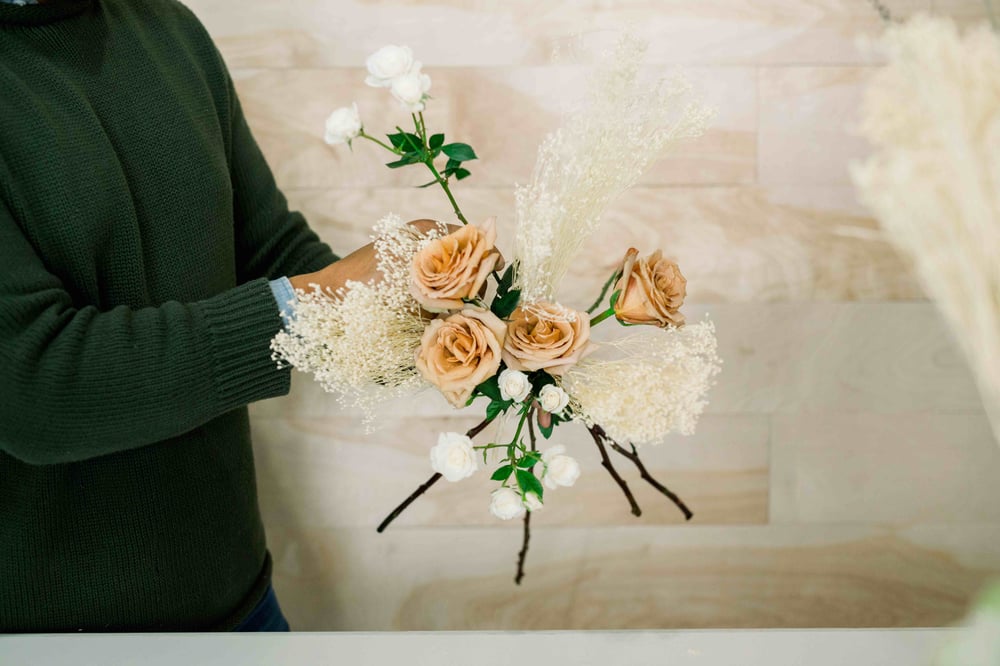
broom bloom, toffee roses, white majolica spray roses,
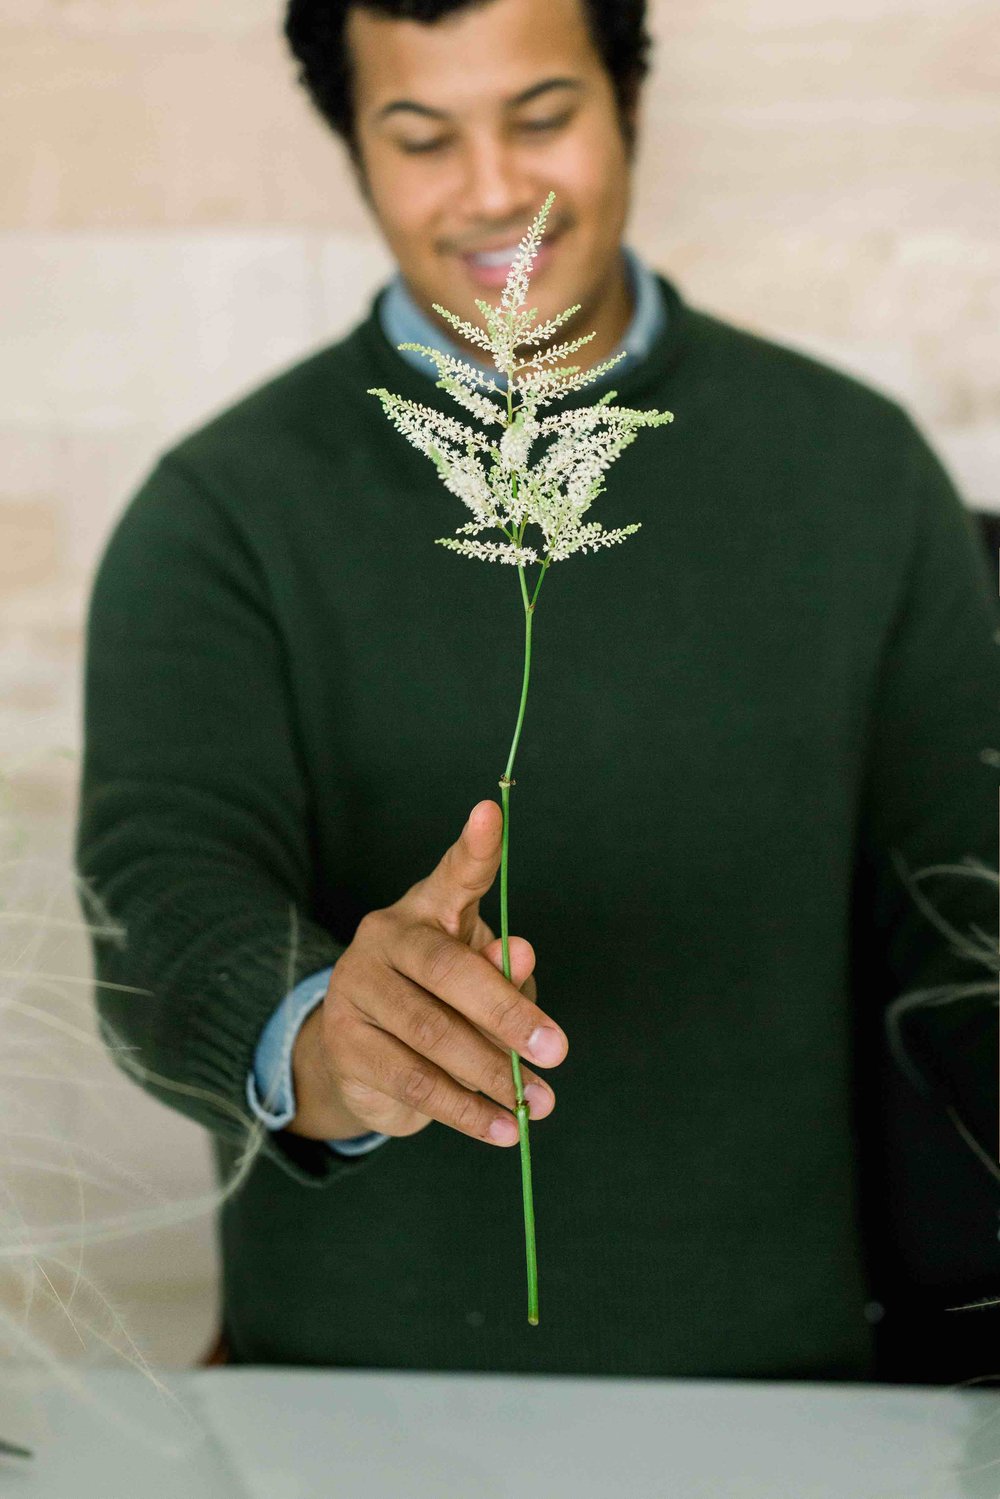
white astilbe, stypha grass, bleached eryngium, clematis pods
Host: Shean Strong, Shean Strong
Videographer & Photographer: Shauna Veasey Photography
TRANSCRIPT:
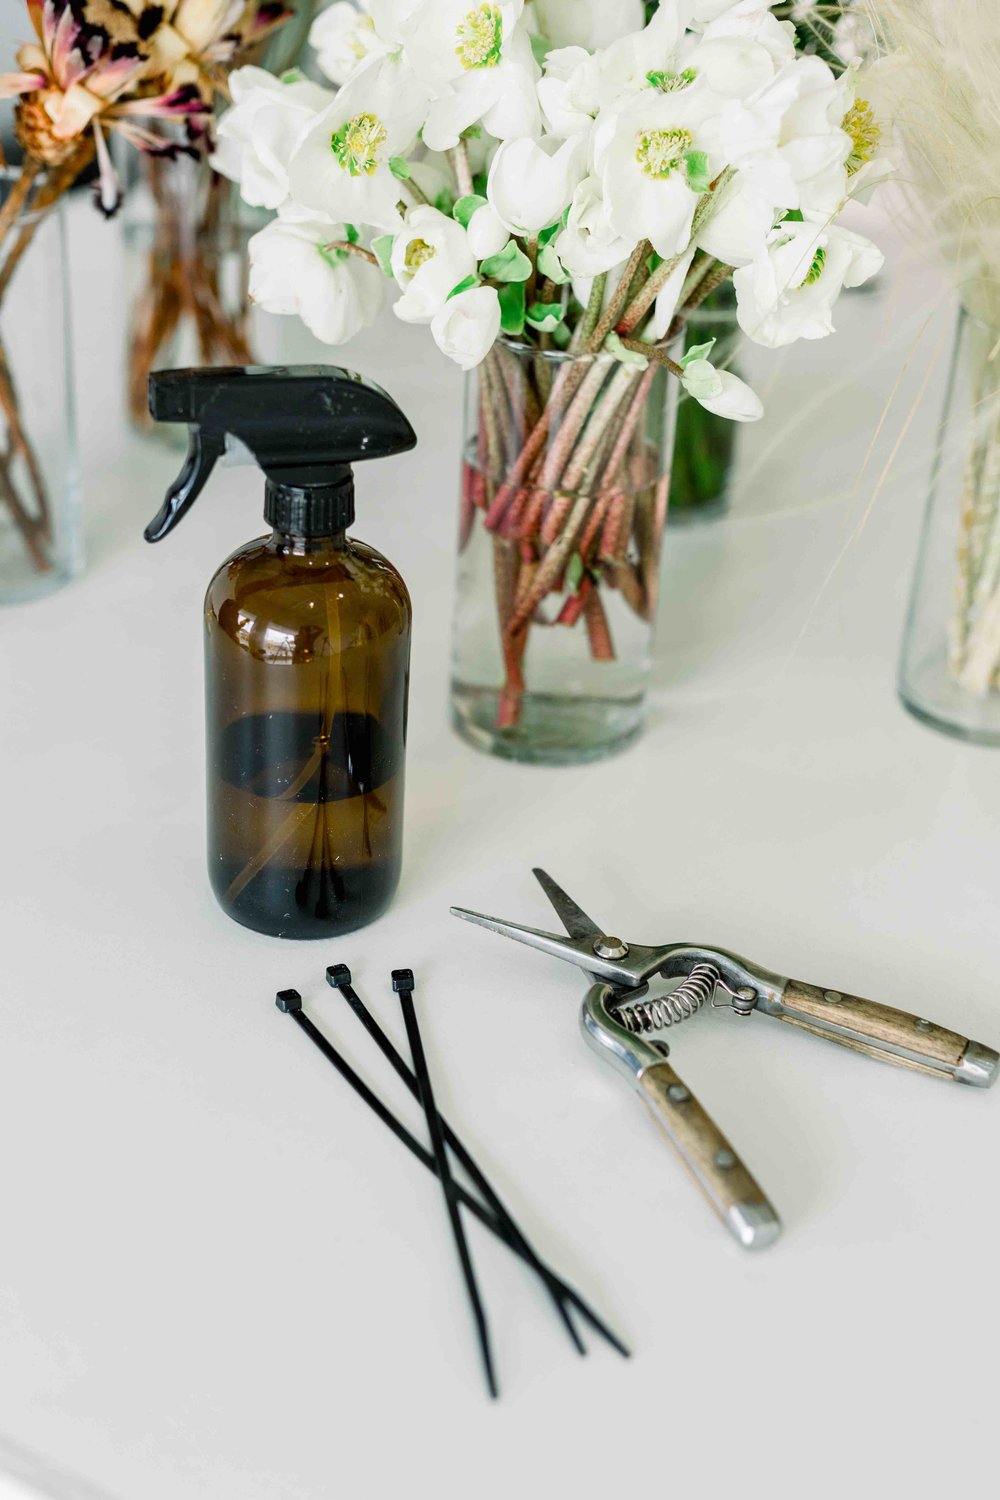
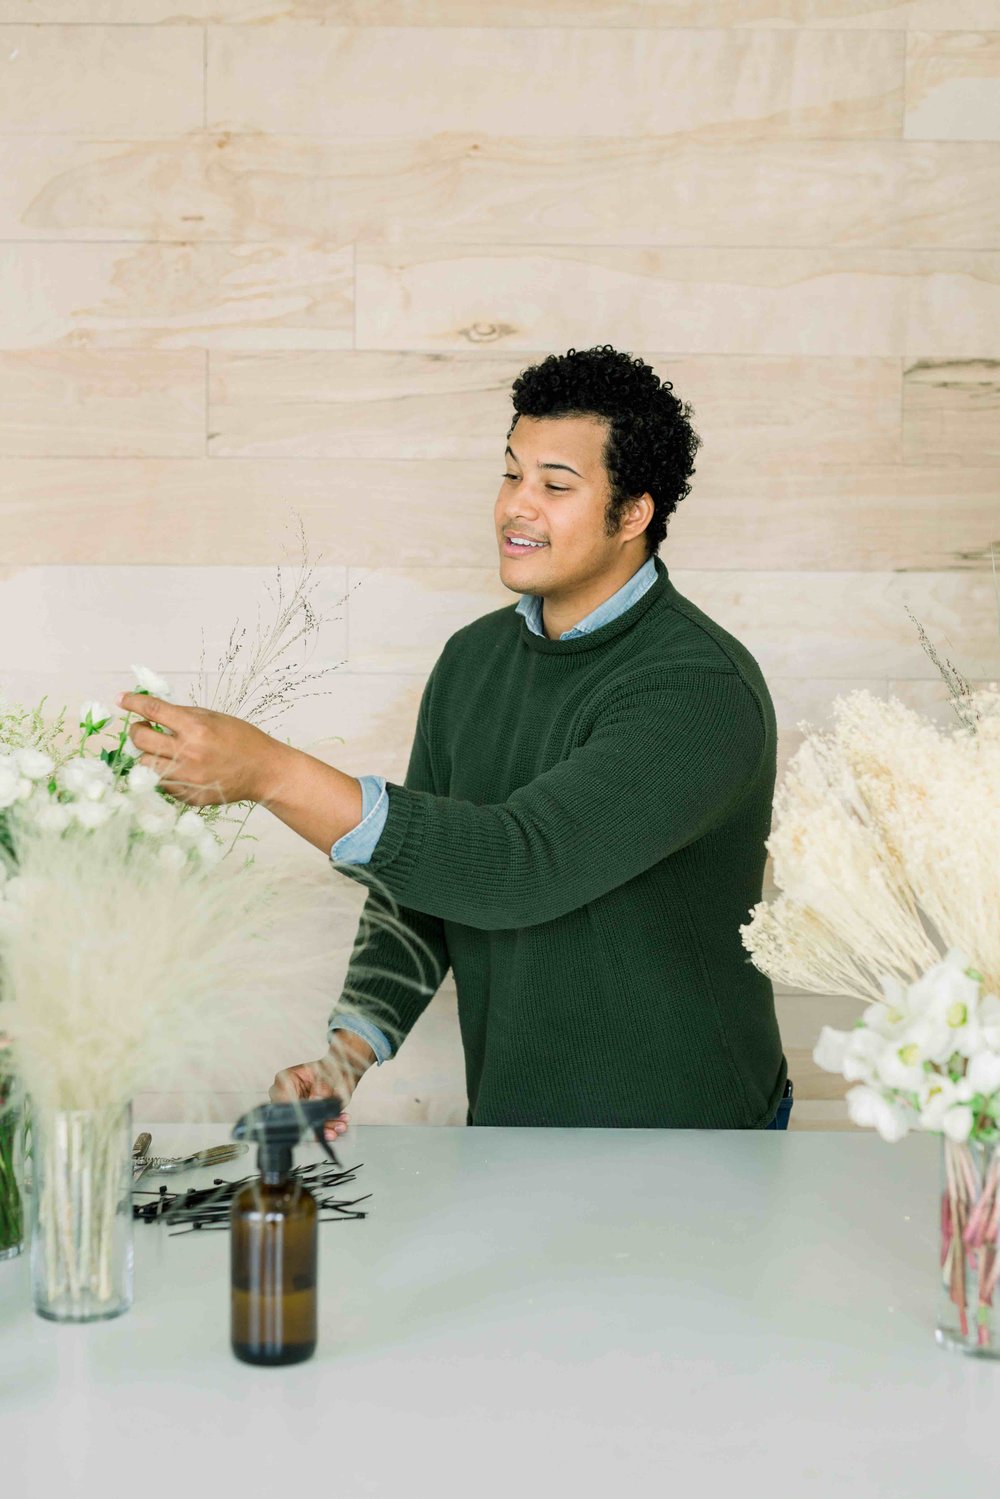
Hey, you guys, it's me, Shean Strong, your 2019 Mayesh design star and I'm so very excited to be here in Park Studios with all these beautiful flowers provided by Mayesh. I'm gonna be designing a bouquet for you guys and I want you guys to follow along as we're using some of these incredible products to create something beautiful for one of your clients. So what we're gonna do is we're gonna make sure that these stems are gonna be completely clean. This is gonna really help when you're doing that hand-tied bouquet, because your other hand's gonna be holding your bouquet while you're designing with this one. So you wanna make sure that thing's are gonna be super easy to input into your bouquet. Now, kind of a rule of thumb whenever I'm designing, I like to make sure that I have all my materials ready for me. I wanna make sure that we have our zipties, which we're gonna use to secure our bouquet. I wanna make sure that we have our snips because we make sure that we can cut those ends off properly. And that's all you're going to really need to get one of these bouquets ready for your client. Now, whenever we're designing I like to make sure that I'm thinking, kind of conceptually, what we're gonna be using. If we're gonna be using a pretty heavy floral design I wanna make sure that we're doing lots and lots of flowers. If we're gonna be doing more of a greenery heavy design I wanna make sure that we're gonna start with our greenery. So today we're gonna be using some dried product courtesy of Japan and Holland and, of course, Mayesh. So right now I'm gonna go ahead and get started designing for you guys. So we have some really cool dried textures right here. And what I like about this stuff is it's creating a really cool texture for your photographer to photograph to make sure that they're gonna have some really cool shots for you. So we're just gonna go ahead and just begin. And I like to do a crisscross pattern like this. When you're using a hand-tied bouquet you wanna make sure that your fingers are gonna be holding your base, because that's what's gonna be interlocking all these stems together. So you're gonna make sure that these are kind of crisscross this direction, laying one on top of the other. That's gonna really help secure your design and give some sort of foundation for the rest of your flowers from building up then. So then right here, since we have two pieces already I wanna add a third piece in. I'm literally just gonna take this and put it in between the three of them. By having three separate pieces like this, all we're gonna be able to do is have a beautiful line for the eye to follow. We want there to be a moment here, kind of over here and go this direction. So that's what we have happening right here. Now, when we start doing our bouquets I like to start with our bigger pieces first. I wanna make sure that we have those bigger blooms, or those bigger grasses, whatever it is, to kind of secure the rest of our bouquet. So we have these three pieces of grass right here. I'm gonna add in these toffee roses. These things are absolutely incredible. Again, a Mayesh product which, I mean, you can't go wrong with these things. So we're just gonna simply lay them into our arrangement. Now, you can see already how my fingers are just kind of interlocking around this bouquet. Your fingers are literally going to be a grid, or the chicken wire, or the Oasis, for your bouquet while you're doing this hand-tied design. So we're just gonna lay one rose in. I typically like to lay a rose to the side as opposed to facing you directly. I feel like this is like a little abrasive to the eye, but having something tilted to the left or to the right is a little softer for you. So we're gonna start layering these things in, there we go. We're gonna add a couple more of these bad boys in. Aren't these insane? They're just beautiful. So when we're creating our arrangements, or our bouquets, we like to make sure that we're doing a level action. So we don't want things to be the same exact plane and we wanna make sure that there's gonna be some depth and some movement to your actual design. So right here we have this kind of happening over here, this over here, a little taller, a little shorter. And this is, again, just gonna create some depth for you guys to follow. Add a little bit more just to create a little bit more texture in the back. So we're gonna add this right over here for you guys. There we go. We're gonna continue to add in our toffee roses. Now, the cool thing about working with a bouquet is you always get to be a little creative with your designs. Tuck these bad boys in and just create some depth. So you can already see how this is starting to create its shape and create a different type of unique look for your client. Now, I like working with larger items first and then going down to the smaller, more delicate, items. By having these bigger places you're able to fill up space and you can tuck in the smaller things and add a little bit more detail to your actual design. So here we go, a couple more of these beautiful roses. And you can see, my fingers are literally interlocked with this. It's pretty crazy what they're looking like, but I promise you it's gonna look beautiful when it's all said and done. A couple more of these roses and we're gonna start building it out. I'm tucking this bad boy in right underneath my fingertips. There we go. You can kind of see that. That way there's some more interest over there, a little bit more texture. We can kind of see the shape that's taking place for our bouquet. Alright, so you guys can see what's happening right here with this bouquet. Again, lots of depth, lots of texture taking place already and we've not even added in the smaller things yet. So we're gonna add one more of these roses in just to kind of make sure that we're gonna be good with our bigger pieces. And again, I wanna make sure that these are gonna be layered like this. I don't wanna have anything on the same plane. A kind of good rule of thumb; if something is on the same plane and your hand can touch both of them simultaneously, either one of them needs to go down or the other one needs to go up. You just need to work on that to create that depth that you guys are wanting to have for this style bouquet. I like to trim my stems as I go. Not only is this gonna help with the weight, because your hand is going to cramp up. I promise you it will. Until you get used to this design and holding your bouquet like this, your hand's gonna cramp up. So, by cutting those stems off, it's really gonna allow you to lose some of that weight and your hand's not gonna be holding something so heavy. So we're gonna add in a couple more elements. We're gonna start adding in some softer delicate flowers. So we have a spray rose. Majolica's are one of my favorites because they just add a very soft, delicate look to any arrangement, any bouquet, any type of installation. Any time we have a hard cut like this we wanna be able to soften it up slightly. So if we add something like this, with that depth that's already integrated in the actual flower, it's really gonna soften it up and add a bit of romance to what you guys are wanting to do. So again, we're just gonna weave this bad boy right into your arrangement, your bouquet. There we go. We can already see how that adds a little bit of whimsy to your arrangements, to your bouquet. We're gonna add a couple more in, because, again, we want the eye to follow a line. We wanna make sure that there's gonna be a transitional point from something high to something low, where we're gonna be able to integrate a lot of cool textures that's gonna allow the eye to fall naturally. So again, just tucking this in. You can see where you already see what's happening. We're gonna add one more little section in. We're gonna add him up top, just so that that line is continuing from the very top all the way down to the very bottom. So there, we can kind of see what's happening right there. We can this see beautiful line taking place and there's lots of cool textures that are gonna be happening. Again, this depth is already natural when it comes to the spray rose. You can see that there's already levels to it. So just by adding it in, it's gonna really soften up your bouquet. Now, this is a fun texture to add in, too, is astilbe. Astilbe's a nice bridal bouquet because it's really light and delicate. It just adds some cool texture to your actual arrangement. So we wanna incorporate a little bit of this. Again, to soften up those edges. We don't want anything to be too hard and to kind of have a blunt stop. We wanna make sure things are gonna be really soft. It's a bridal bouquet, after all, we don't want this to be crazy. Now, if you guys have been following me for quite some time, this is gonna really help with you not having one of those lightsaber bouquets. Because what happens with that, is you just look like you can hold this little popsicle stick and we don't want that. We want something a little bit more romantic, a little bit more natural, a little bit more organic. So by having something like this, with lots of depth and lots of texture to it, we're gonna create that naturally. So there we go. We have this really cool texture taking place. Now, grasses are one of my favorites to add into any type of arrangement. This dude right here, tuck him in over here on the side and you can just see how it adds this beautiful, delicate look to the arrangement already. How it literally just floats. Imagine that, as a photographer, as the bride, seeing something like that being captured on film is absolutely beautiful. Tuck a couple pieces in here. And you guys, we'll make sure that we have a link for all of these flowers that we're using and we'll make sure that you can see everything that's going on in this actual arrangement. But again, just having these fun textures. It's about making lots of fun with your bouquet, making sure that you are enjoying yourself and being creative. This is one of those pieces that the bride's gonna keep forever. It's either gonna be one of those photos where they're gonna have it over their mantle or they're gonna share with their friends and family. So you wanna make sure that you're not only just being creative, but you're also thinking about them as well. Now, this right here is clematis. I love working with this. This is a variety of it and we have multiple types of clematis, but this is a really cool texture that's just gonna add a little bit of fun to your arrangement. Again, you can see my hands, how they're literally interwoven back here with all of these flower stems. It's really gonna be beneficial later on because this is really gonna be secure when you start to ziptie your bouquet. So there we go. I'm gonna start pulling some of these out because they're starting to get tucked in a little bit and we wanna make sure that there's gonna be lots of depth, no empty holes taking place. We're gonna add maybe some more astilbe over here. Now again, a lot of this product is dried. So, if you're looking for an all-white bouquet this is something that would be a little bit different. You can add in some more tan colors to elevate this just a little bit. We'll add in another cool texture. Feel free to play around with this. I know oftentimes when you're designing you feel like everything has to be perfect. It doesn't have to be. You can start playing around and start placing things and see if you want something there. If you want it coming out in this direction. You can start moving things around and have fun with it. I want you guys to feel completely confident that you are able to do something absolutely beautiful and play around and know that it doesn't have to be perfect the first time. So there we go. I like this dude right here, I might add another one in. Again, this is something that's very unique and something that's gonna be a little bit different than your standard bridal bouquet. Alright, there we go. I'm liking how this is looking. I'm gonna add of those other toffee roses in the back over here. You can see there's kind of an empty space right here and I wanna make sure that that's gonna be filled. We don't want there to be too much negative space. Negative space is a good thing, but we wanna make sure that we don't have too much of it. Alright, so there we go. To soften up this edge again, I'm gonna make sure that I add in some hellebores. Hellebores are beautiful flowers that are really going to help soften that little area down there. So by just adding one or two of these little stems it's just going to add a nice, little pop to the bottom for you. Now, a really cool thing that you can add into your arrangements or your bouquets is some grasses. Grasses are really fun because it allows you to peer through your bouquet or your arrangement. It almost adds a little bit of secrecy to what's going on. It forces the eye to kind of look through it. So that way it creates that engagement that a lot of people want with their flowers. So we're gonna add this dude in over here, pull him down to the bottom. And you can just see how he adds a little bit of texture. He pulls in this dark chocolate color that's pulling up some of these darker tones in these toffee roses. By having this dude in here we're just creating a little bit more interest, a little bit more texture, a little bit more depth to what's taking place. So there we go. We're gonna cut this dude back down. Now I'm liking our bouquet. Again, this is gonna be a one-sided bouquet. So when you're designing this the back can obviously be filled in with some flowers over here, just to make sure it looks like it's gonna be completely finished. You can tuck in some roses. You can tuck in some spray roses and that's gonna really help let it look like it's completely finished. So we'll tuck some of these bad boys in over here. That way there's no mechanics that are gonna be seen for your actual bride. They're not gonna be seen at all. The zipties are not gonna be seen and all that stuff taking place. So we can just finish it off in the back right over there. Again, make sure that you're cleaning off all of your stems. We wanna make sure that this is gonna be very, very clean. We're taking our ziptie, going through our fingers like this, and we're just zipping them together. There you are. Now, when your bride is gonna be posing with your bouquet make sure that they are always camera-ready. So they're facing this direction, you want them to turn it slightly. If they're gonna be facing dead on, you want it this way. So that way this part right here, the most beautiful part is gonna be completely dead on, dead center of the actual photograph. Thank you guys so very much. I cannot wait to meet each and every one of you guys at the workshops that we have coming up. We're gonna go a little bit more in-depth on how to do bouquet, how to do centerpieces, how to do installations. This is all courtesy of Mayesh and I cannot wait to meet each and every one of you guys. Thanks so much and I hope to see you guys next time.